> ## Documentation Index
> Fetch the complete documentation index at: https://docs.instaforge.app/llms.txt
> Use this file to discover all available pages before exploring further.

# Client intake form

> Send the business a form to fill in on their phone, then build the assistant from their answers.

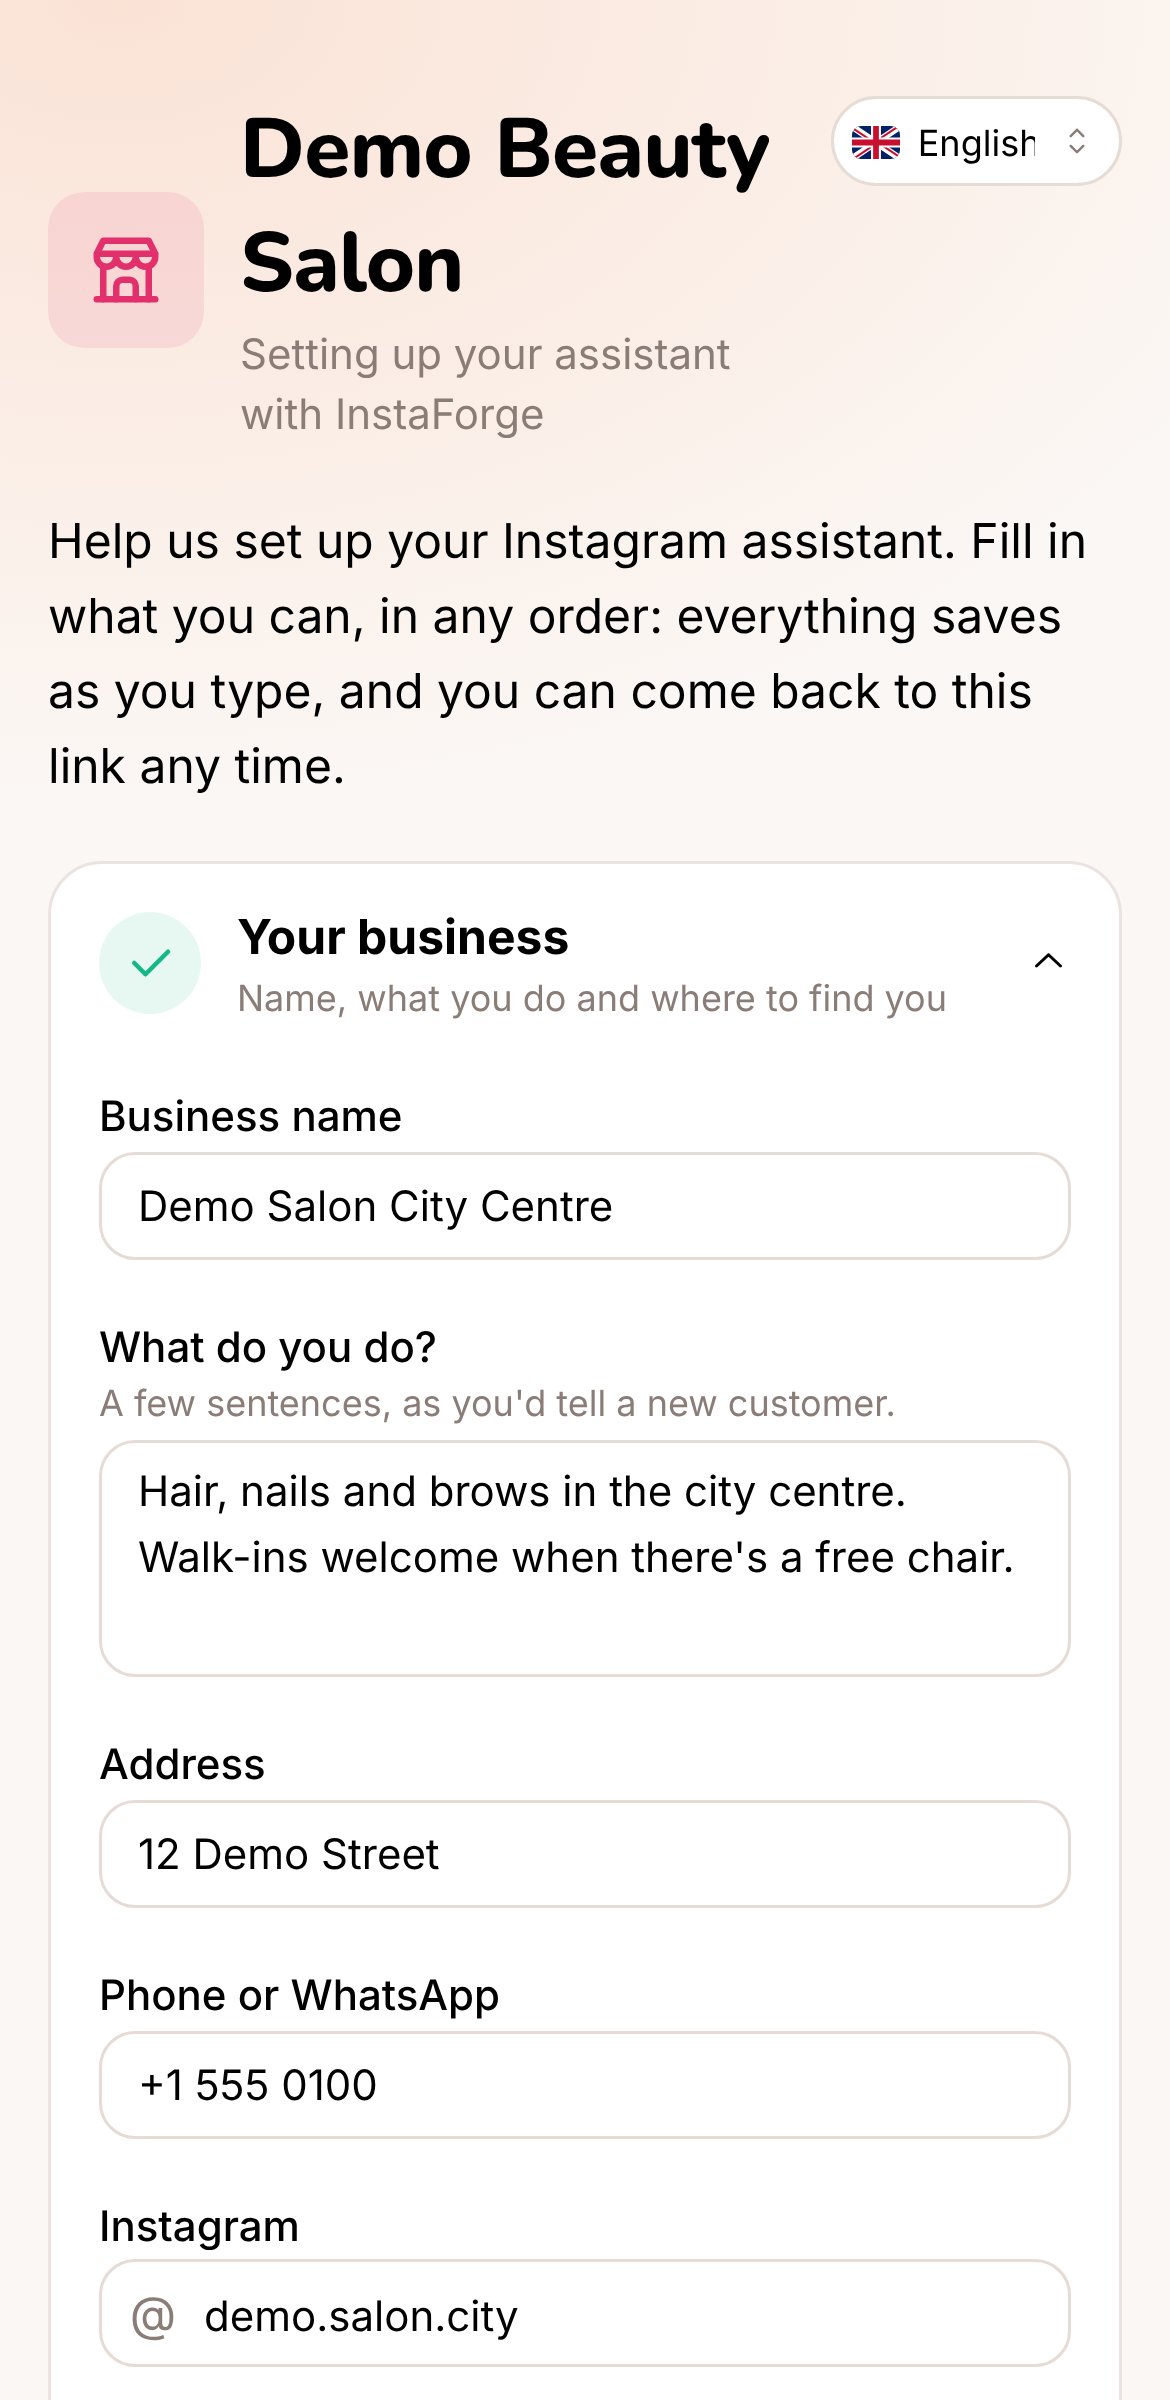
Instead of collecting prices, hours and rules over WhatsApp, send the business one link. They fill in their details on their phone, in their own language, and connect their Instagram account from the same page. Quick setup then drafts the assistant from their answers for you to check.

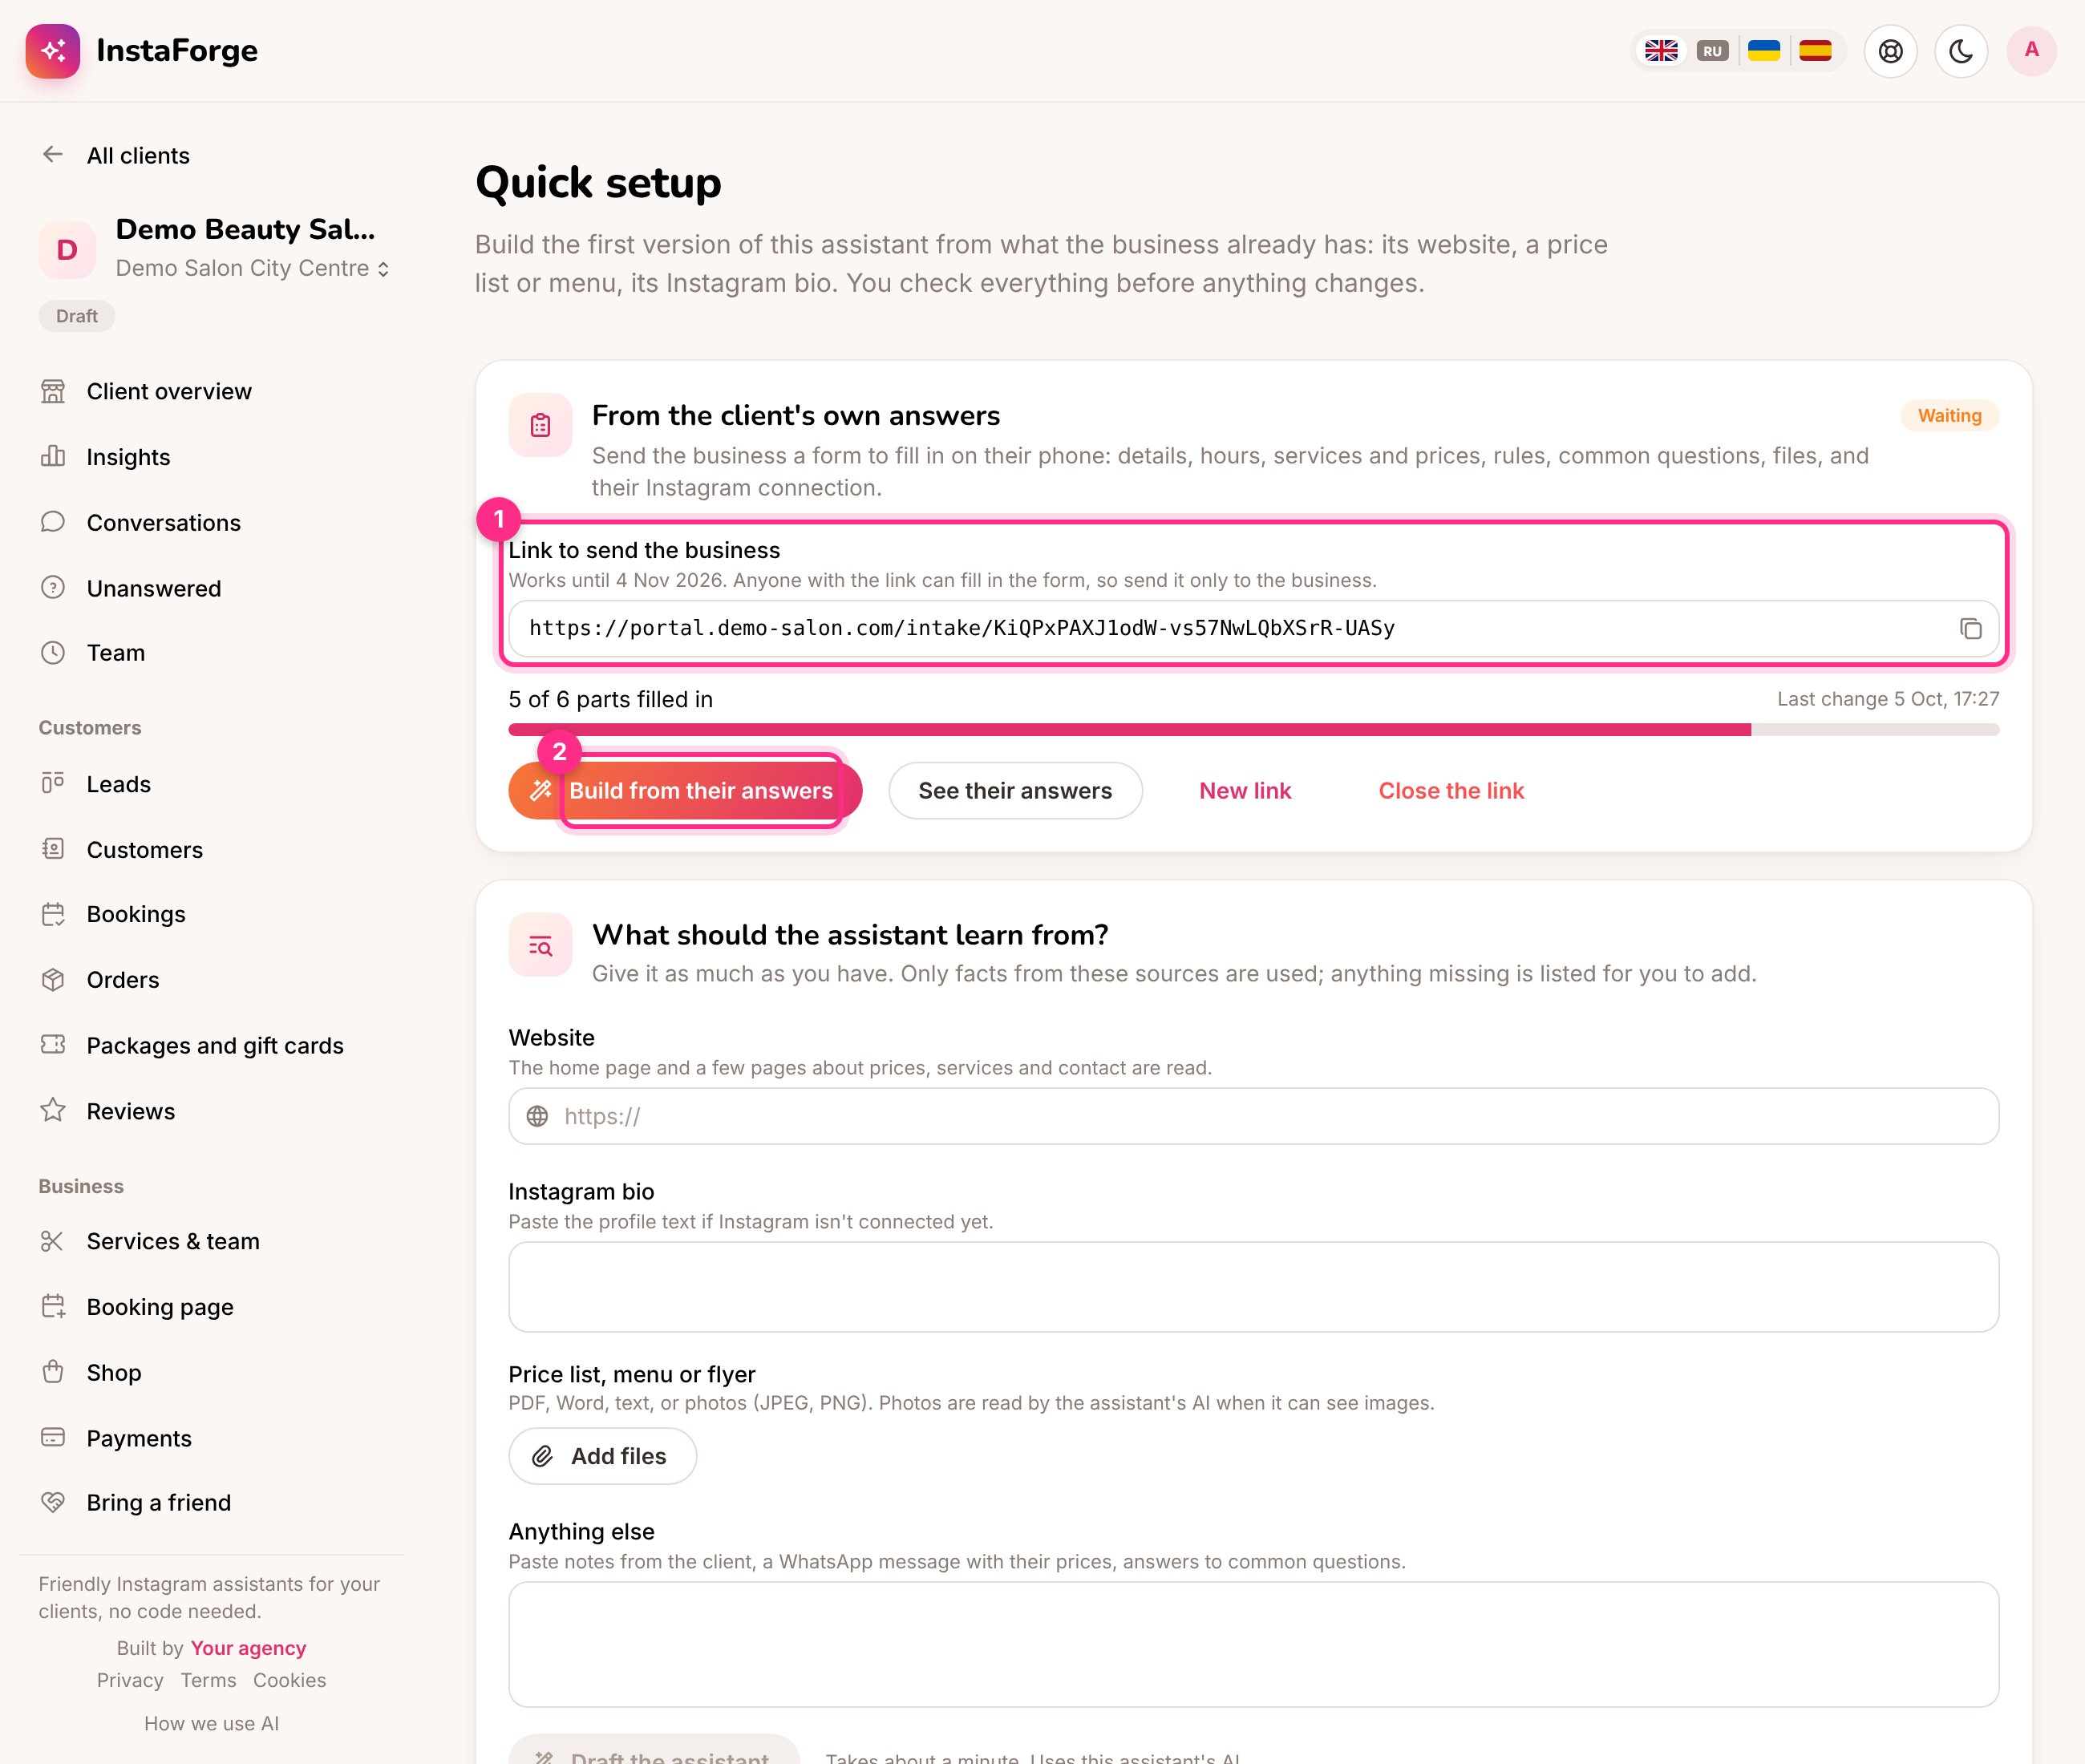
<Frame caption="On Quick setup: the link to send (1) and building the assistant from the answers (2)">
  <img src="https://mintcdn.com/instaforge/VmM-7msTvRzCAXLt/images/intake-team.png?fit=max&auto=format&n=VmM-7msTvRzCAXLt&q=85&s=edfdfd61e05e40d9015d158ba4f60e00" alt="On Quick setup: the link to send (1) and building the assistant from the answers (2)" width="2600" height="2200" data-path="images/intake-team.png" />
</Frame>

## Send the form

<Steps>
  <Step title="Open Quick setup">
    In the assistant's menu, open **Quick setup**. Admins and editors can use it.
  </Step>

  <Step title="Create the link (1)">
    Choose the language of the form (English, Russian, Ukrainian or Spanish) and click **Create the link**. The business can switch the language on the form too.
  </Step>

  <Step title="Send it to the business">
    Copy the link and send it to the business owner, for example on WhatsApp. It works for 30 days. Anyone with the link can fill in the form, so send it only to them.
  </Step>
</Steps>

## What the business fills in

<Columns cols={2}>
  <div>
    <Frame caption="The form on a phone">
      <img src="https://mintcdn.com/instaforge/VmM-7msTvRzCAXLt/images/intake-phone.png?fit=max&auto=format&n=VmM-7msTvRzCAXLt&q=85&s=19178a8dbf6113ab2106a8b64b5cc71c" alt="The form on a phone" width="1170" height="2400" data-path="images/intake-phone.png" />
    </Frame>
  </div>

  <div>
    * Their business: name, what they do, address, phone or WhatsApp, Instagram and website
    * Opening hours, day by day
    * Services and prices, with how long each takes
    * Booking and cancellation, payment, and delivery rules
    * Questions customers often ask, and their answers
    * Their logo, and files such as price lists, menus or photos of signs
    * How the assistant should talk, and the languages their customers write in
    * A button to connect their Instagram account

    Everything saves as they type, in any order, and they can come back to the link later. When they press **Send**, everyone who manages the assistant gets an alert.
  </div>
</Columns>

## Build the assistant from the answers (2)

The card shows how many of the six parts are filled in and when the business last changed something.

* **See their answers** shows everything they wrote and lets you download their files. If they uploaded a logo, **Use as the client's logo** puts it on the portal, booking page and shop.
* **Build from their answers** drafts the assistant from the answers, their files and their website, the same way as [Quick setup](/getting-started/quick-start) does. The opening hours and prices are kept exactly as they typed them. Check the draft, untick what you don't want, and apply.

<Tip>
  You can build as soon as some parts are filled in, and build again later when the business adds more.
</Tip>

## Close or replace the link

**New link** makes a fresh link, and **Close the link** stops it working. Either way the old answers and files are removed, so build from them first if you need them. What you already applied to the assistant stays.

<Info>
  The form shows only the business's own answers and files. It doesn't give access to the dashboard, the conversations or any other client.
</Info>

AI agents can do the same with the `client_intake` tool: create a link, check progress and build the draft.


This documentation is built and hosted on [Mintlify](https://mintlify.com), a developer documentation platform.