

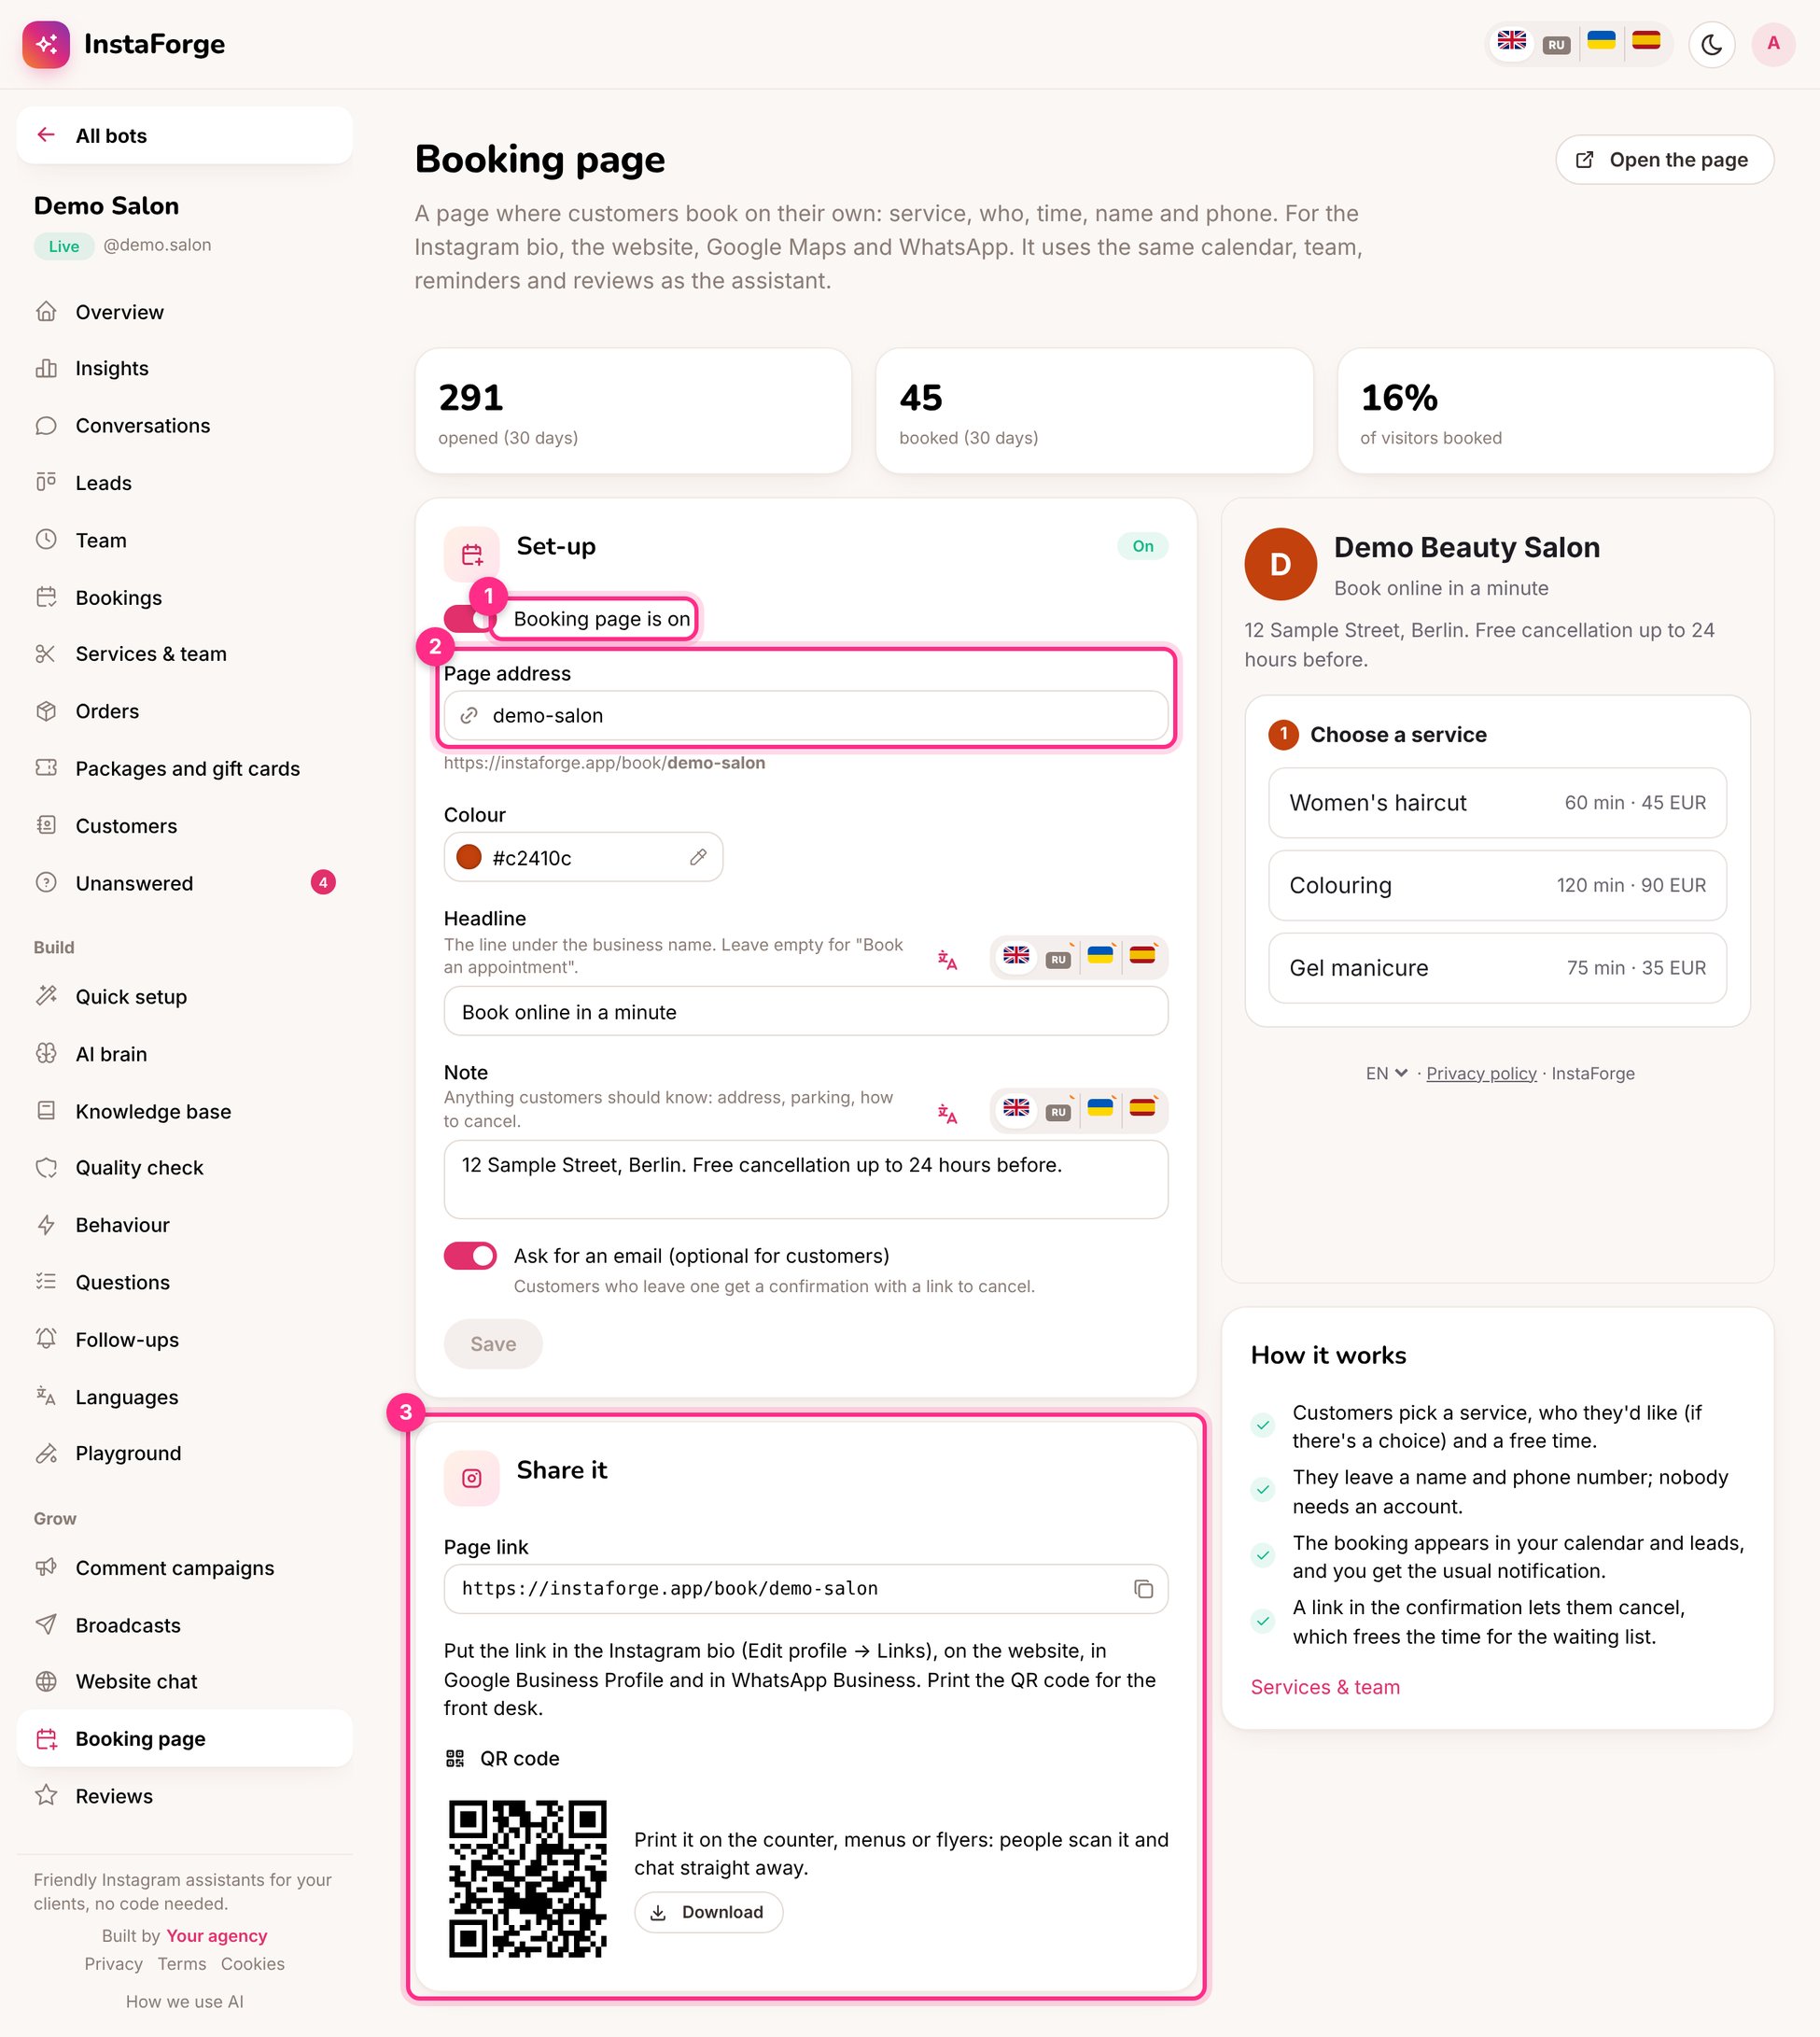
Booking page settings: turn it on (1), its address (2) and how to share it (3)
Set it up
1
Switch it on (1) and choose the address (2)
For example
demo-salon. The page lives at instaforge.app/book/demo-salon.2
Choose a colour, a headline and a note
The note is for anything customers should know: the address, parking, how to cancel.
3
Decide whether to ask for an email
Customers who leave one get a confirmation with a link to cancel, and can confirm by email.
4
Share it (3)
Copy the link or download the QR code.
What customers see
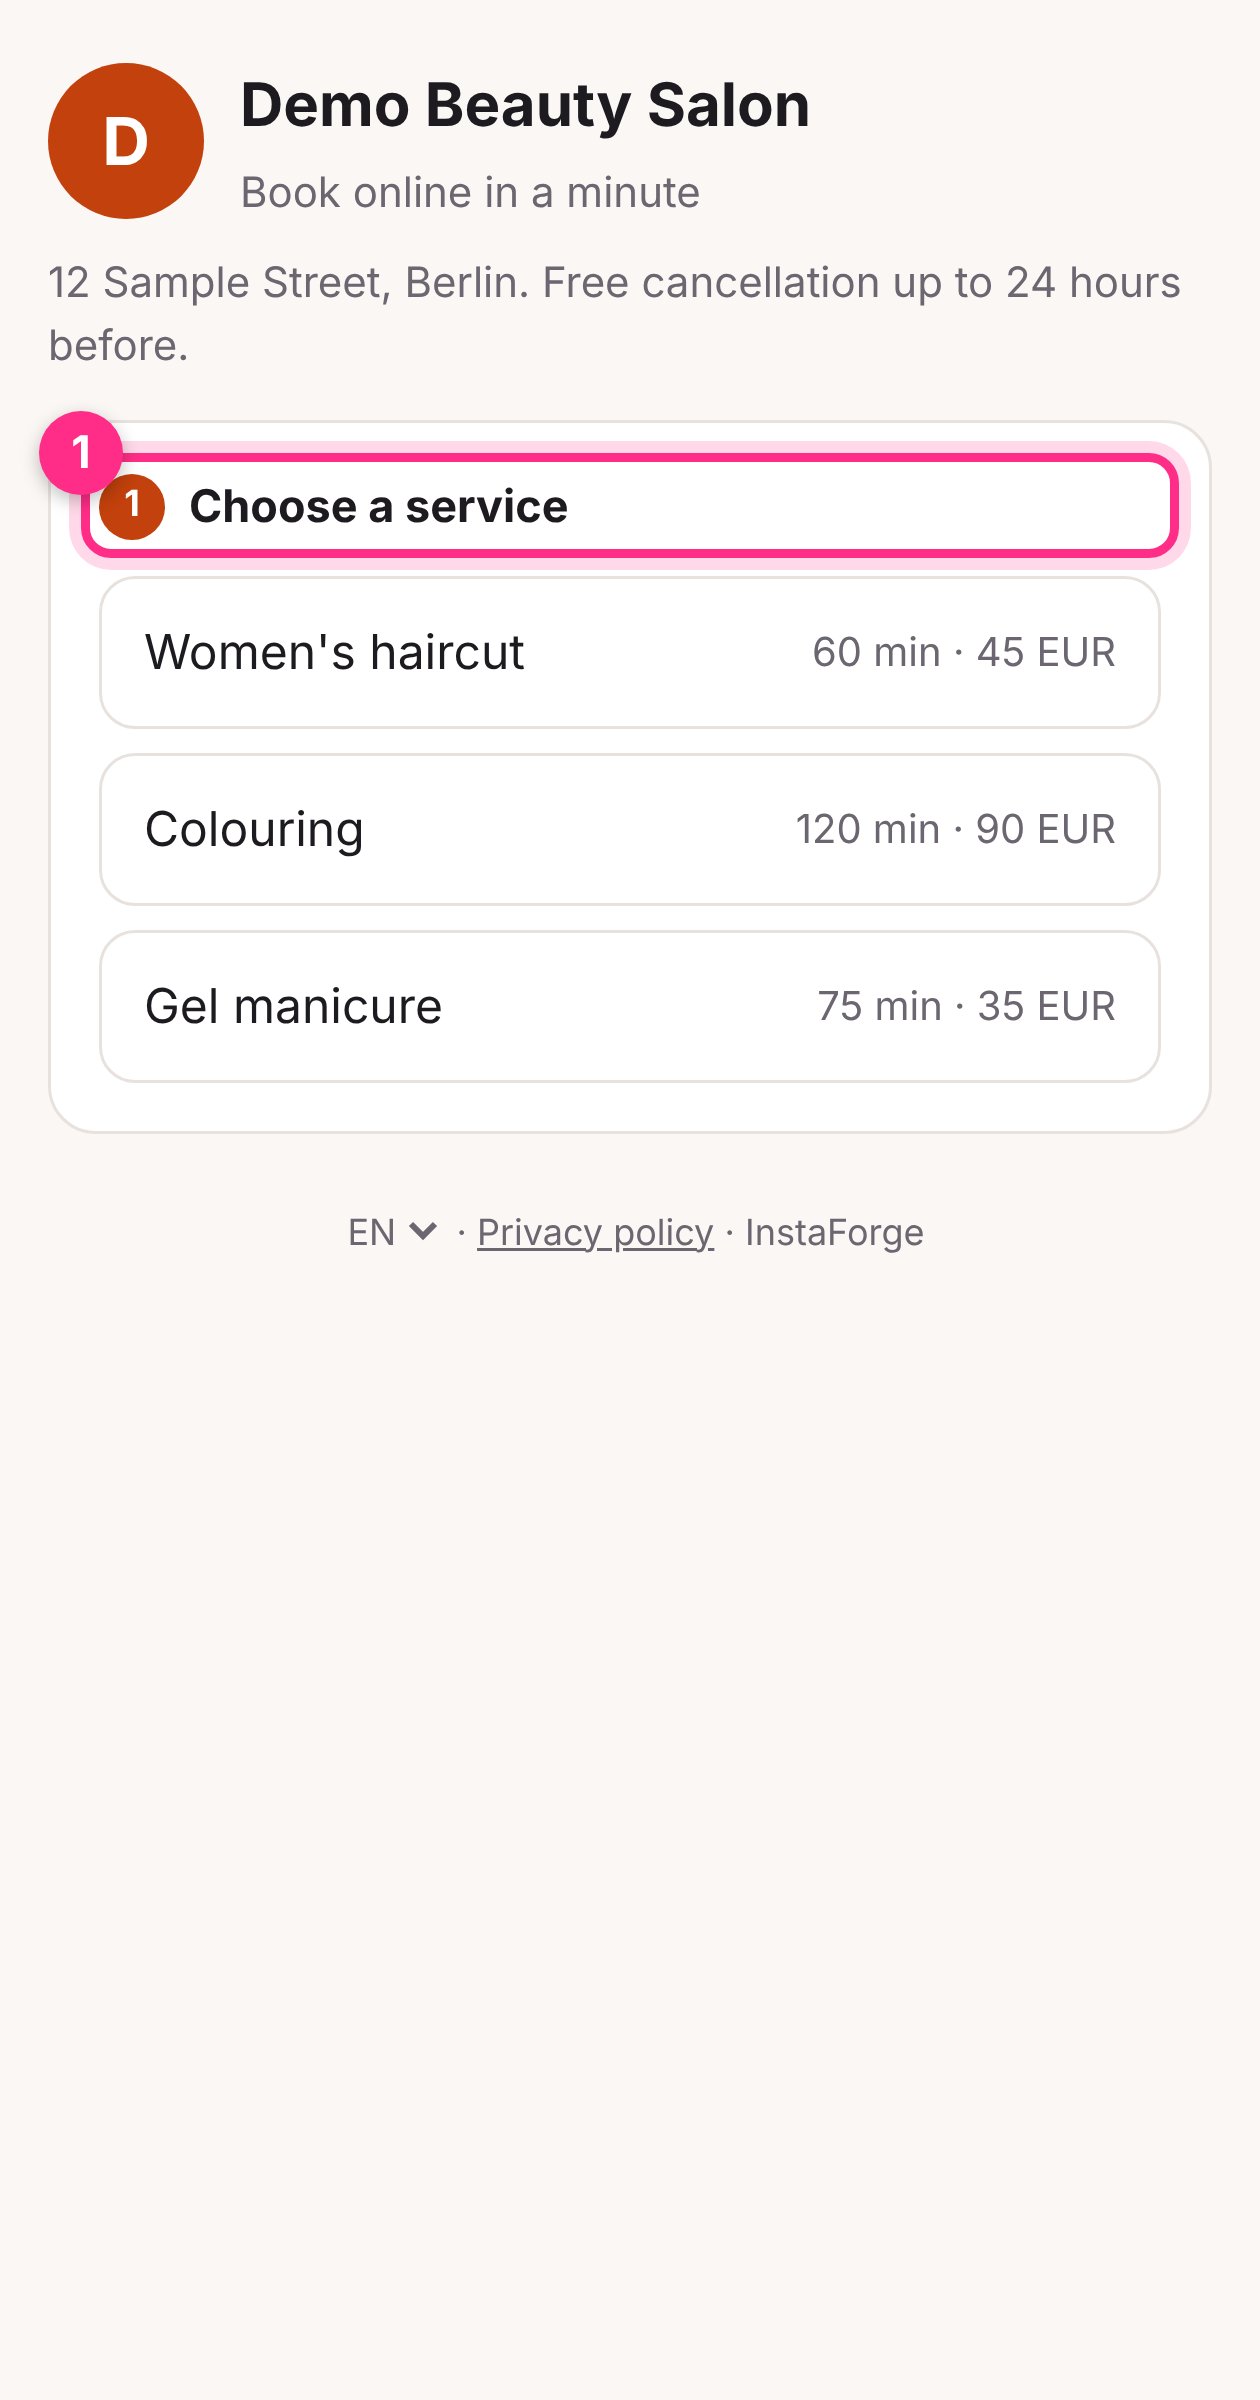
The booking page on a phone
- Choose a service (with its length and price)
- Choose who, if there’s a choice
- Pick a free time
- Leave a name and phone number, and optionally an email
- Done: the booking appears in your calendar and leads, and you get the usual notification
Where to put the link
- The Instagram bio: Edit profile → Links
- Google Business Profile, as the booking link
- WhatsApp Business: in the profile and as a quick reply
- The website, as a “Book now” button
- Printed on the counter, menus and flyers as a QR code
The page shows in the customer’s language and can be switched at the bottom. Fill in the headline and note in each language, or use Languages.